Customize your scheduling process with optional or required fields, whether for your office staff or online scheduler. Optional fields offer flexibility for additional details, while required fields ensure essential information is provided upfront, streamlining the scheduling process.
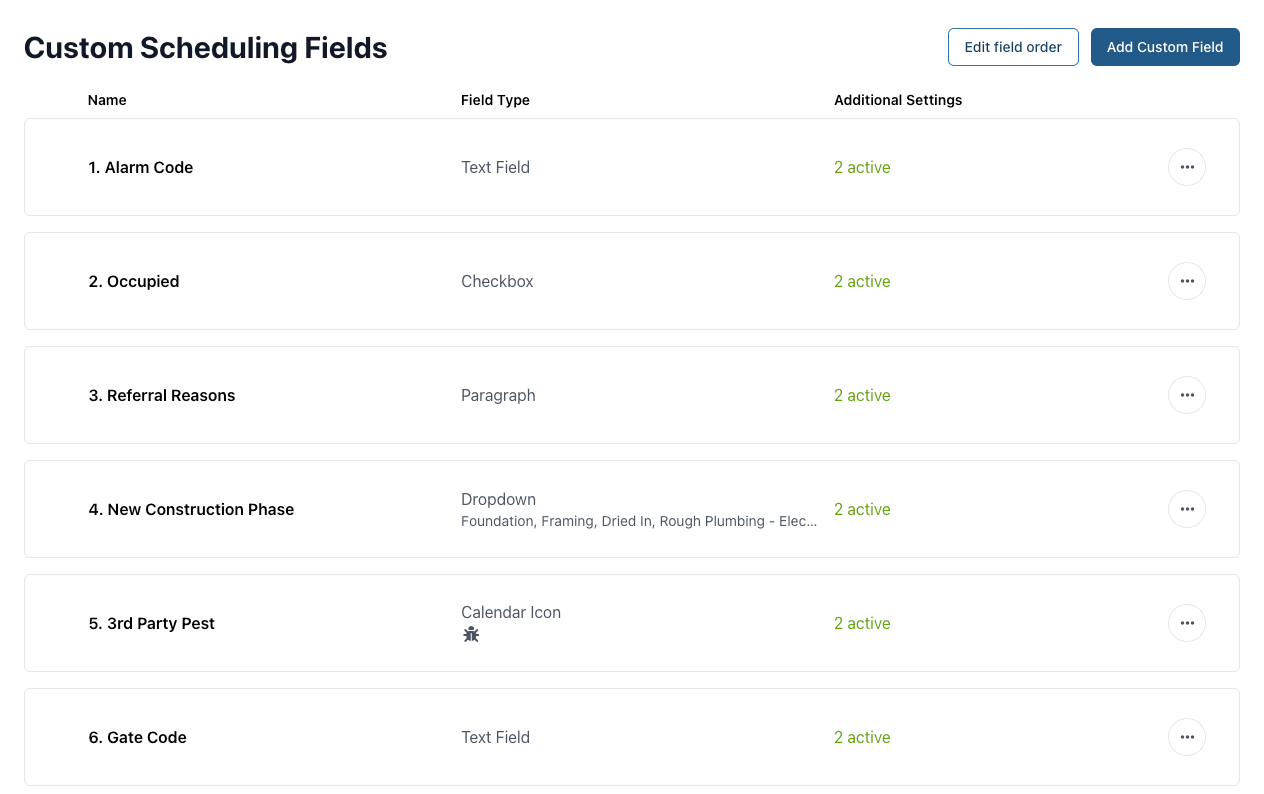
We have just updated the configuration page for Custom Scheduling Fields (CSFs). The new experience cleans up the process of adding and/or editing your custom scheduling fields and sets the stage for upcoming enhancements to CSFs as well as the scheduling process in general.
NOTE: If you don't have any need to add to or edit your CSFs then you don't need to do anything as the functionality of the CSFs remains the same at this time.
Follow along with this article to see how you can create your own custom scheduling fields.
What's New with the Custom Scheduling Fields
What's New with the Custom Scheduling Fields
With this update, you will now see a link at the bottom of Settings / Scheduling Options labeled Manage Custom Fields which will open a new page with all your custom fields.
On the new page, you will see an easy-to-read list of your CSFs and buttons to Add a CSF or Edit the order of the CSFs.
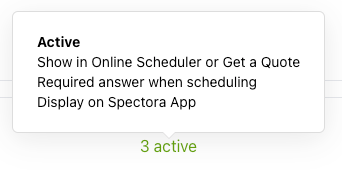
You are also able to quickly see where CSFs are displayed and whether or not they are required by hovering over the Additional settings indicator for any CSF.
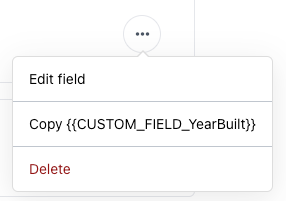
Clicking on the 3 dot menu button for a CSF will provide options for editing, deleting, or copying the placeholder for the CSF.
How to Create a Custom Scheduling Field
How to Create a Custom Scheduling Field
Under your Scheduling Tools, you'll have the option to create your own custom fields. In this section, we'll show you how!
Click "Settings"
Click "Scheduling Options"
Click "Manage Custom Fields"
Click "Add Custom Field"
Enter the name of your custom field
Select your custom field type
To make this a required field during scheduling, click "Required answer for Online Scheduler" to check the box
To have this field displayed in the mobile app for inspectors, click "Display on Spectora app" to check the box
To have this field displayed in the Online Scheduler or Get a Quote widget, click "Show in Online Scheduler or Get a Quote" to check the box
Click "Save"
Your new custom scheduling field will now show in your CSF list
What Each Custom Field Response Means
What Each Custom Field Response Means
You'll be able to give your Custom Field a name and select the response format. Let's go over what each response type means.
Text - Allows the user to enter any text. This might be useful for "Lockbox Code" for example.
Number - Allows numeric input only. This might be used for "Number of Bedrooms" for example.
Checkbox - On/off. This might be used for "Is the property occupied?" or "Are utilities on?".
Calendar Icon- Gives options for N/A, Yes, or No and adds the icon of your choosing to the calendar based on the answer given. Once you create your Calendar Icon field, click Set Icon to choose.
Dropdown - Allows you to offer a fixed set of choices from which the user can pick one. This might be used for questions like "What kind of property is this?" with answers "Single Family, Multi-Family, Condo, Townhome, Commercial".
Paragraph- Allows you to enter a paragraph of texts/notes. These appear in the internal box on the Inspection Details page
Date- Pulls up a calendar to select the date of scheduling
Date and Time - Allows option to select the date and time of scheduling
Editing, Deleting & Copying Custom Field Info
Editing, Deleting & Copying Custom Field Info
Click "Settings"
Click "Scheduling Options"
Click "Manage Custom Fields"
To edit the order of your CSFs, click "Edit field order"
Click the dots to the left of the field name, then drag & drop the field into your preferred order
Click "Save order"
To edit an existing custom field, click the 3 dots on the right
Click "Edit field"
Edit the name or display features of the field
Click "Save"
To delete a custom field, click the 3 dots to the right
Then click "Delete" to delete the custom field
To copy the placeholder for a custom field, click the 3 dots to the right
Then click "Copy"
Frequently Asked Questions
Why can't I remove one of the custom fields from my list?
If you use a call center like ACC, there are some fields that are required by them for scheduling. Those cannot be removed.
I created a new custom field and I see the option to use the placeholder for it. What does the placeholder do?
The placeholder will automatically pull in the information for that field wherever you put the placeholder code. You can use it in your agreements, templates, emails, etc.
How do I change the field type for my custom scheduling field?
Unfortunately, it is not possible to change the field type of a custom scheduling field. Instead, you'll need to delete the existing custom field and create a new one with the preferred field type.
Why can't I change the field type for my custom scheduling field?
Each field type has specific coding that determines how it displays and functions. Changing the field type after it is created can cause significant display issues. To maintain functionality, field types cannot be changed or edited once created.
If you have any questions or feedback, write into our chat bubble or email support@spectora.com!


