
Whether you want to take a hands-on approach to SEO, or provide useful information for your clients, blogging is a great way to keep your website's content fresh and interesting.
Step 1: Determine if You Have a Blog
Head to your website's menu (where all the page links are like Home, About, Services, Your Report, etc.) and check if there's one that says 'Blog'. If so, skip this step! If not, your first job will be to use our website edits form to ask for a blog page. Once we build that, we'll often add a placeholder blog post that you can delete once you start adding your own.
This page will be where all your blog posts go once they're published.

(Ok, you caught me, you don't actually need to add that last part 😉)
Step 2: Finding and Adding Blog Posts
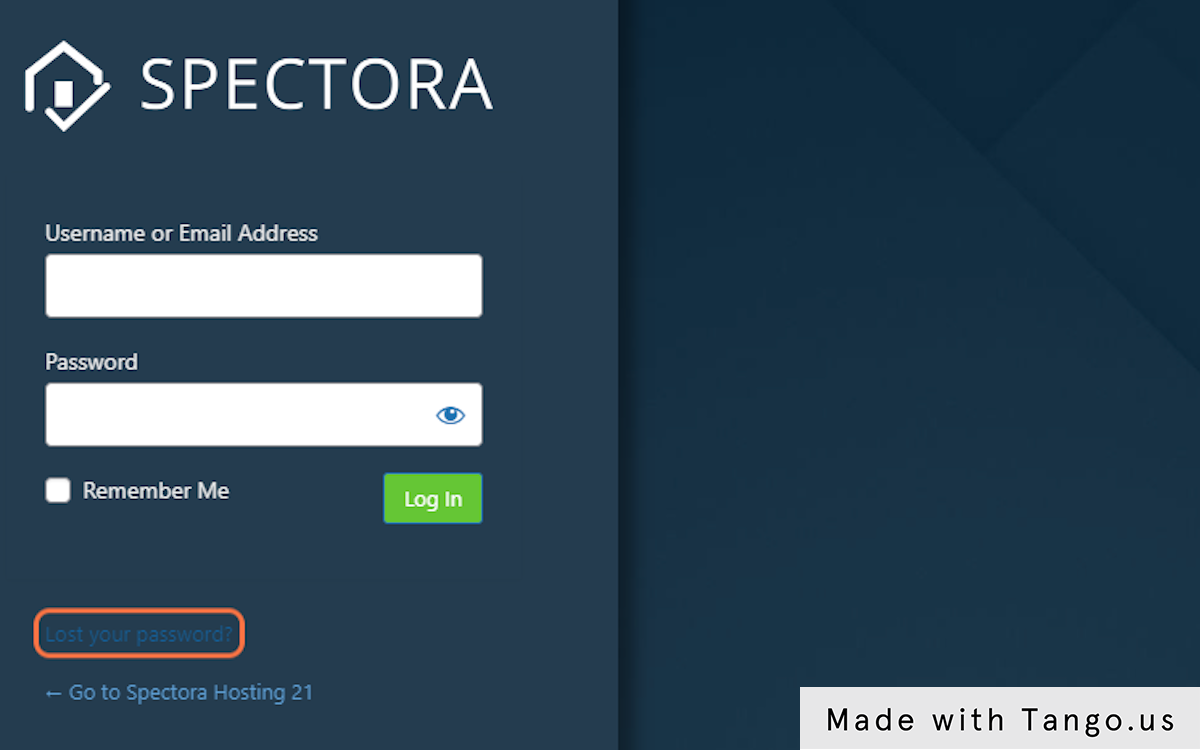
Now that the web team has built you a blog page, you can start adding posts to it. In the address bar at the top of your browser, add /login to the end of your website address. It'll look a bit like this, with your site's address in the place of MY-WEBSITE-ADDRESS.

Hit enter to navigate to your login page. You should be taken to a blue or white screen asking for a username and password. If you don't know your password, you can hit 'Lost your password?' -- We usually set your account up with the email you used for your website or the email you used to contact us. When you enter your email in that text box, if an account is associated with it, it will email you a Password Reset Request from Spectora Hosting. Use the instructions in that email to create a new password.
Not getting that reset email? Reach out to the green support bubble on your Spectora Dashboard and ask for the web team. We can help you gain access to your account!
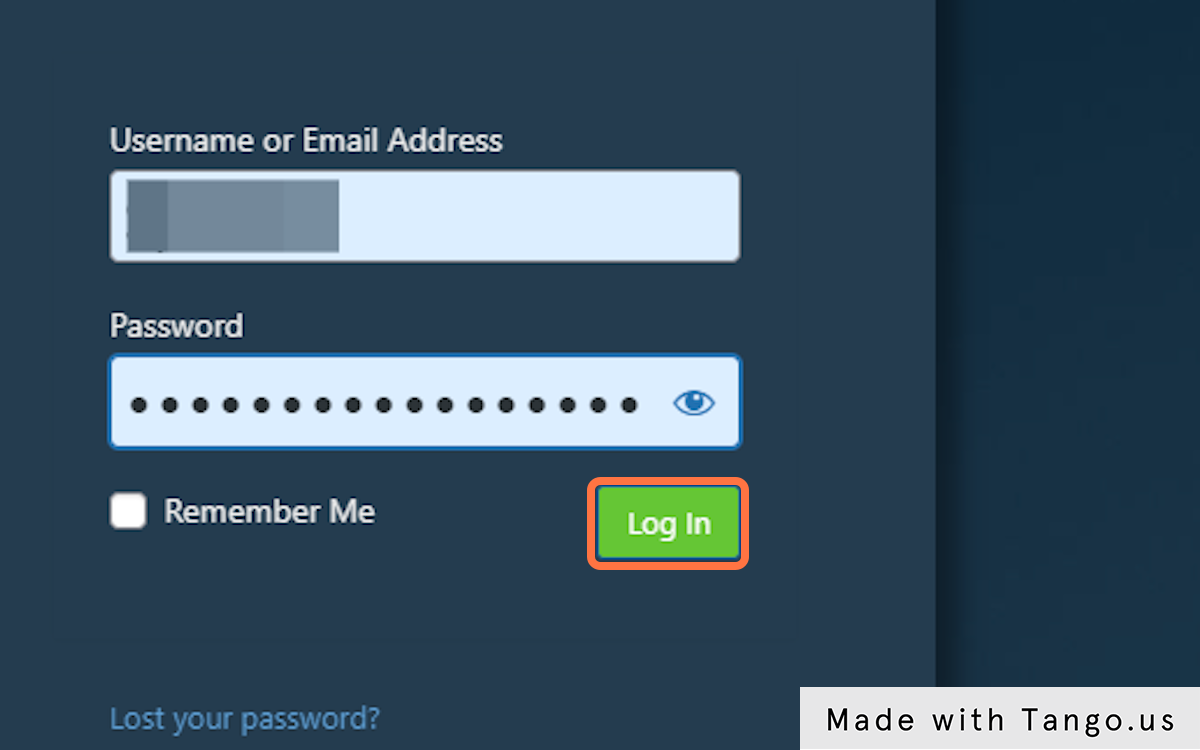
Once you have your email and password, you can use them to log in to your admin dashboard.
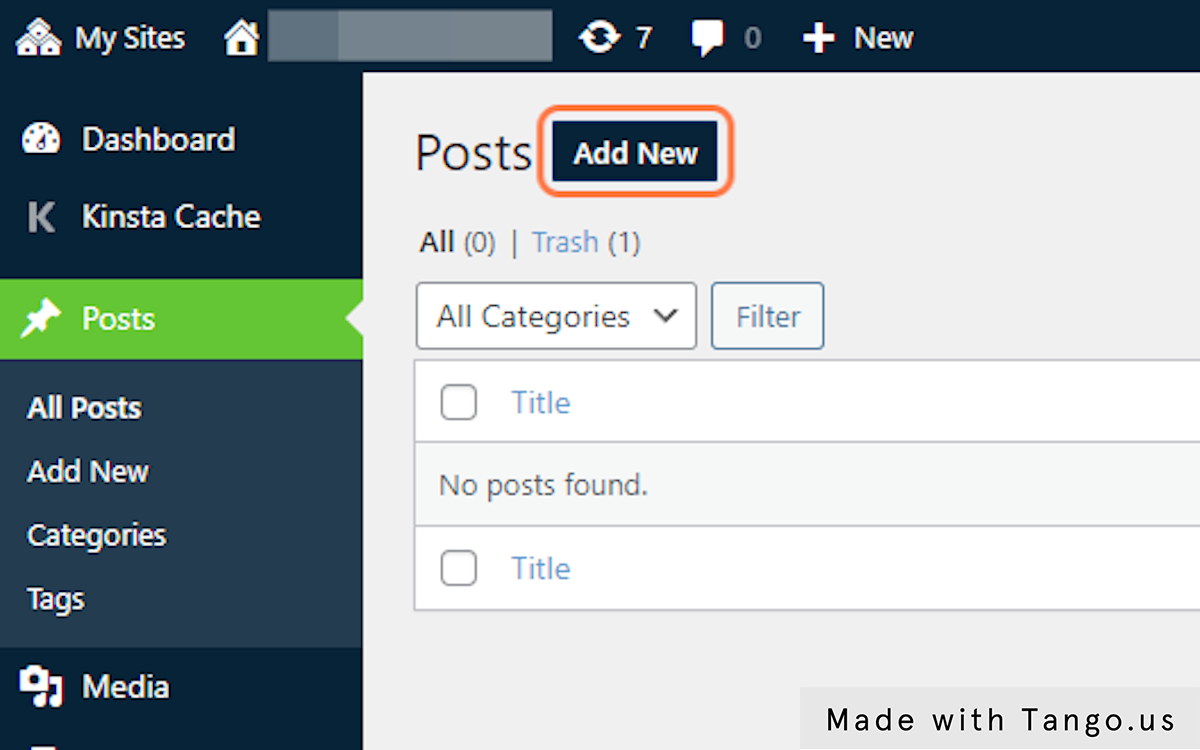
On your dashboard, click 'Posts' in the lefthand menu.

Click on 'Add New'
Make sure the 'Visual' tab is highlighted on the right. If you're familiar with HTML and CSS, you can use the text editor.
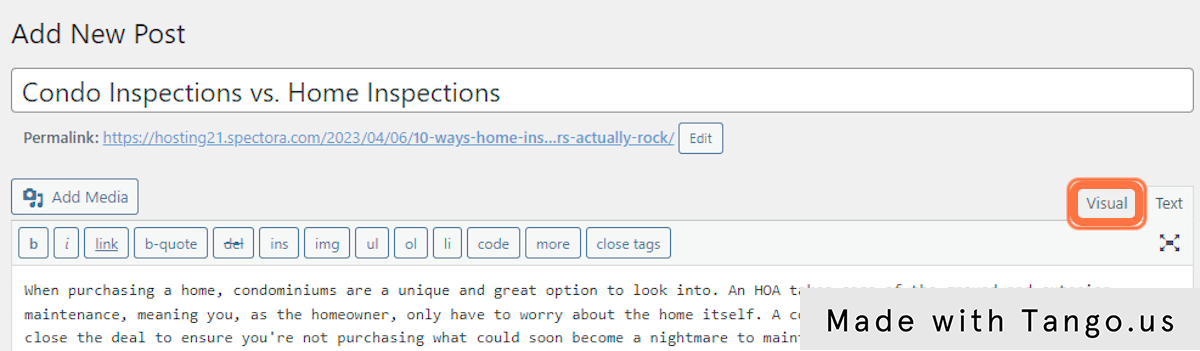
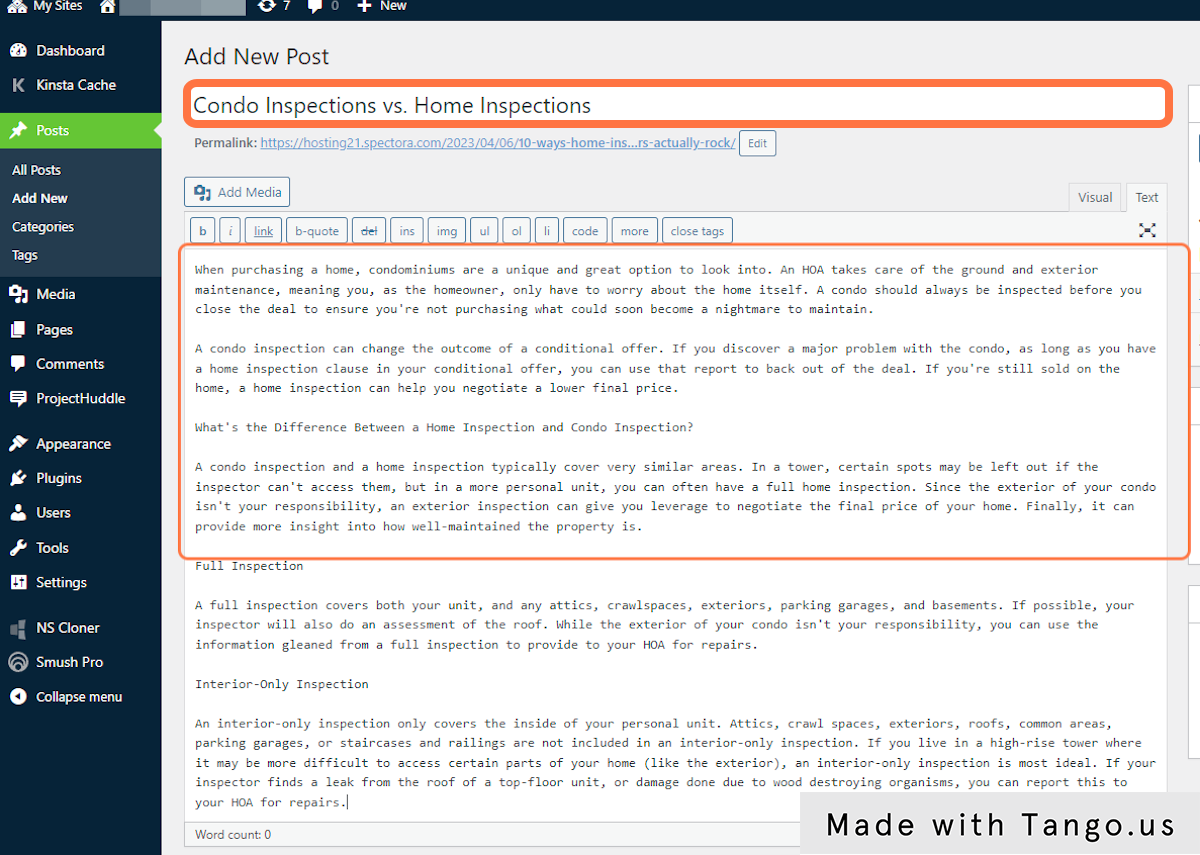
Write your blog title and content.
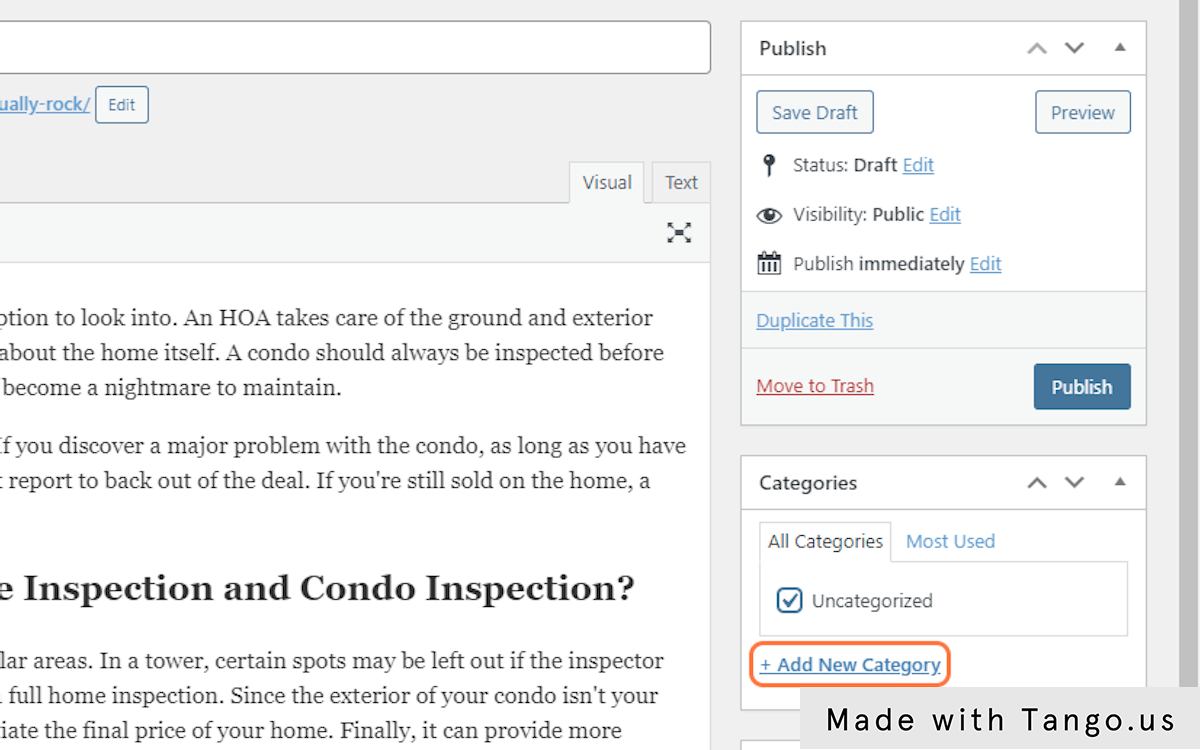
On the far right under 'Categories', select a category or click "Add New Category" to add a new one. Your post can be filed under multiple categories.
Scroll down and click 'Set featured image'
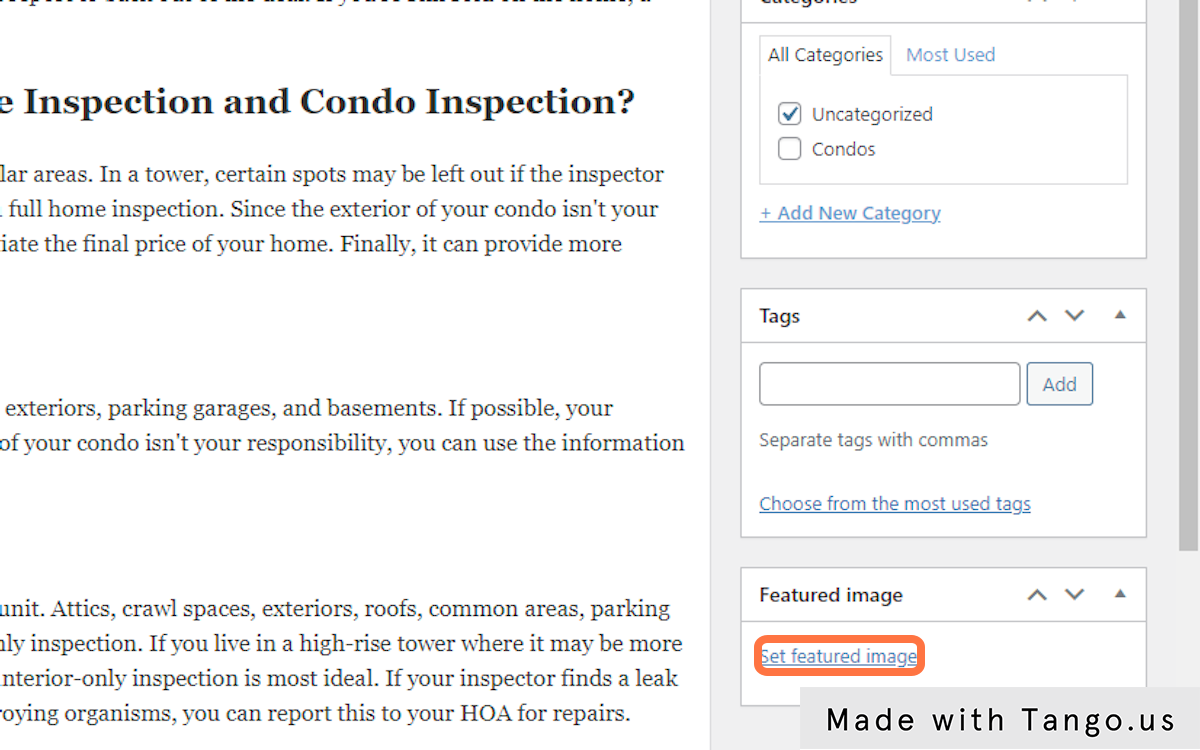
A popup will open where you can select whether to insert an image already on your website (pictured below), or upload an image directly from your computer.

Once you pick your image, click 'Set Featured Image' in the bottom right corner.

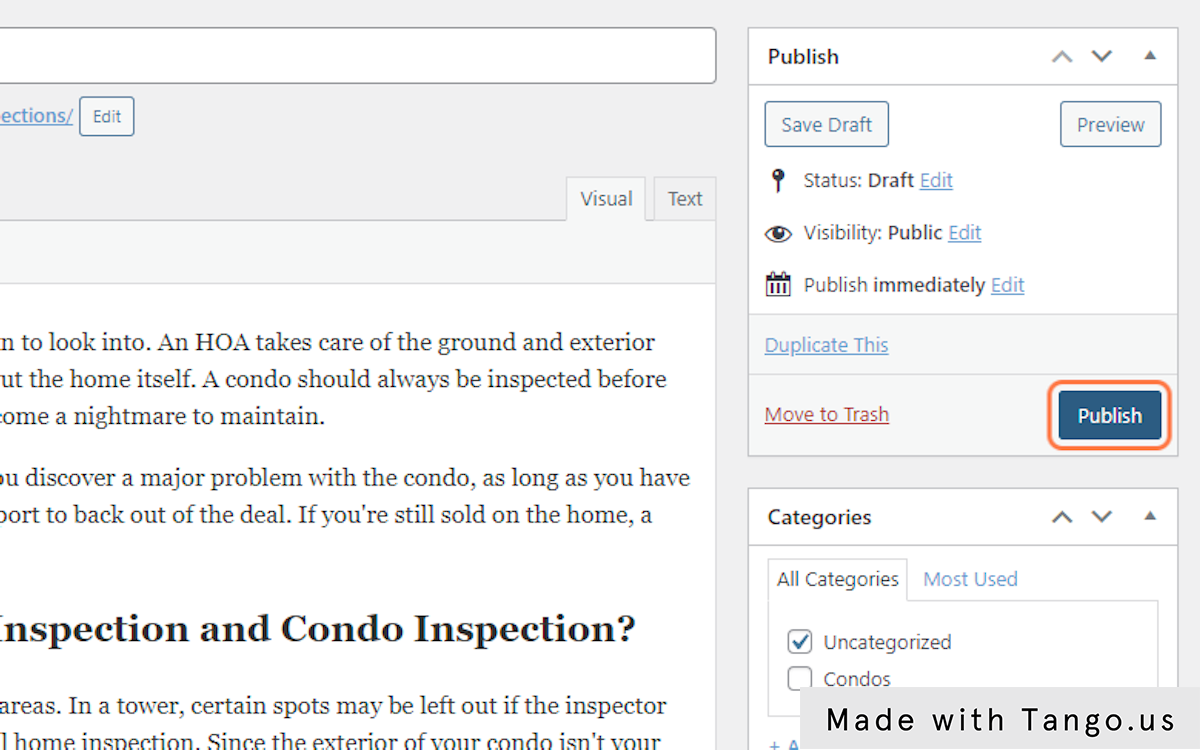
Once you finish your blog post, hit 'Publish' to post it to your blog page! It should appear there automatically.
Spectora builds high-quality home inspection websites with out-of-the-box SEO setup.
